How to use Zapier

If you’re looking for a beginner’s guide on how to use Zapier, you’re in the right place. This article explores several Zapier tips and tricks, most helpful to those who’ve just started to use this automation and integration platform.
Founded in 2012, Zapier powers more than 2.2M businesses across the globe and enables integrations for over 5K apps and tools, which is more than any other integration and automation platform out there.
What is interesting from a management perspective, Zapier has been a fully remote company since day one. So, it’s no wonder it’s so good at enabling automated team workflows.
Whether you’ve already started to use Zapier or are still considering it, keep reading for Zapier best practices for beginners.

As you begin your Zapier journey
If you’ve been looking for a platform to automate some tasks and connect your most-used apps to your everyday processes, you’ve definitely come across Zapier as one of the more popular tools of its kind. And this popularity is well-earned. Here’s why.
Zapier’s essence is automating interactions between various triggers and responses – you set that if X happens, Y will be the reaction. Thus, with Zapier, you can automate specific tasks, releasing you from the burdens of manual work. A connection between a trigger and a response is called a Zap. Here’s an example of what a super simple Zap can look like:
Trigger: You receive an email with an attachment.
Response: The attachment is automatically saved on Dropbox.
Another reason so many professionals love Zapier is that it helps apps communicate with each other. Zapier can integrate apps even if it wouldn’t normally be possible. Many apps we use daily have built-in integration, for example, with social media apps. So it’s hard when you have to work with tools that don’t integrate that way. In such cases, Zapier is a great help.
Zapier tips that’ll make your life easier
Let’s hit the road with tips on how to use Zapier.
When you first start using the tool, you receive a 14-day free trial with all of Zapier’s paid features. After the trial ends, you can upgrade to Starter, Professional, Team, or Company plan or keep using the Free one. Plus, if you choose to be billed annually, you can save up to 33% compared to monthly fees.
Creating your first Zap
Zaps are the workflows you can set up with Zapier; they’re the essence of the tool.
A Zap is made of a trigger, an action, and a task.
To create your first Zap, log in to your Zapier profile, find a bright orange button on the left upper corner of your dashboard – it says + Create Zap – and click it. Now you’ll be sent to the Zap creation page:
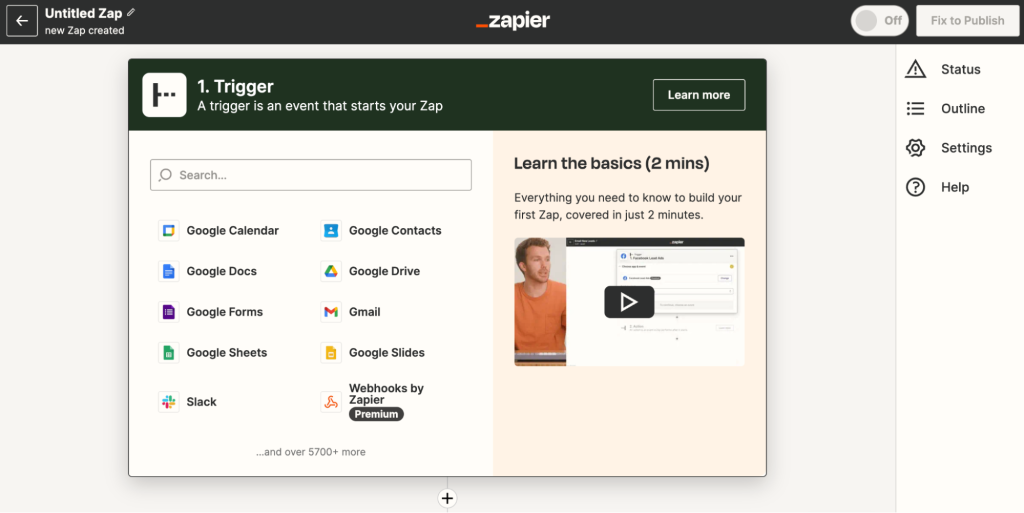
First, you’ll be asked to add a trigger:
- Pick a trigger app – an event happening in this app will trigger the Zap
- Choose a triggering event – this event will set off the Zap
- Set up the trigger – you can tweak some conditions if needed
- Test the trigger
Now, when the trigger is set, you’ll move on to adding the action part:
- Pick an action app – the app where Zap will perform the action if the trigger is set off
- Choose the event – what will happen
- Set up the action – add details, tweak some conditions
- Test the action
To give you a better idea, here’s an example.
I set up the following Zap – if a new document is added to a folder named Zapier test in my Google Docs, a new email draft is created in my Gmail account.
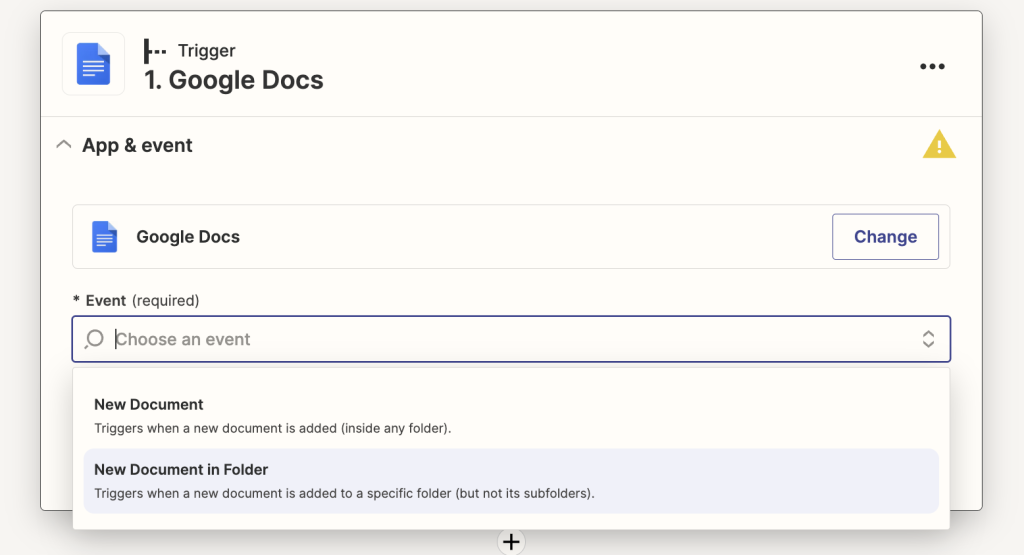
First, crafting the trigger part. I selected Google Docs as my trigger app, then chose the triggering event – New Document in Folder – from the options that Zapier offered (it usually offers a convenient list).
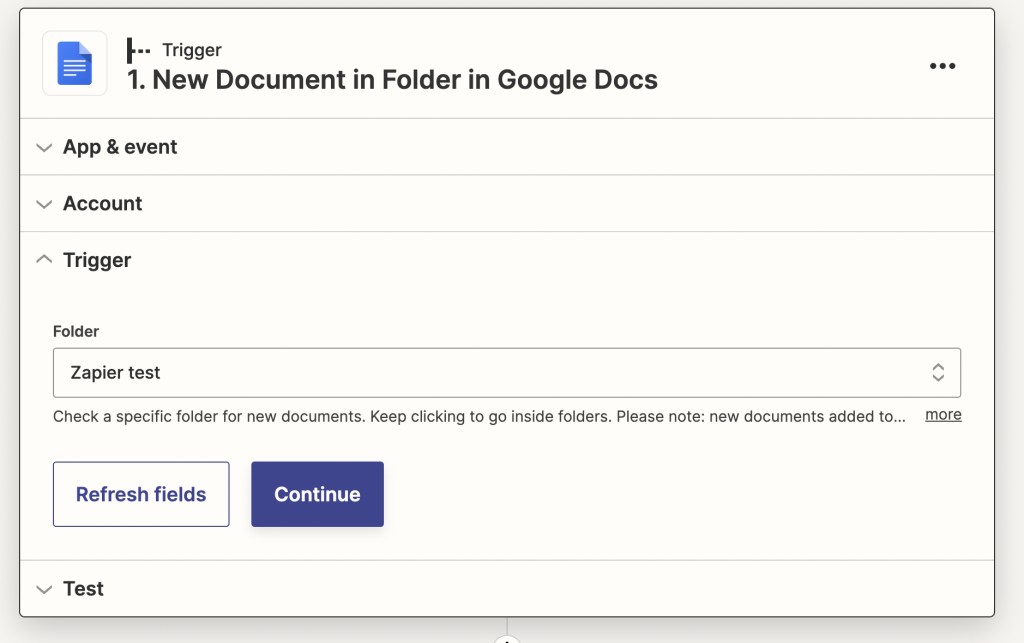
Then I selected the folder in which a new document creation will set off the trigger.
Lastly, I went to test the trigger.

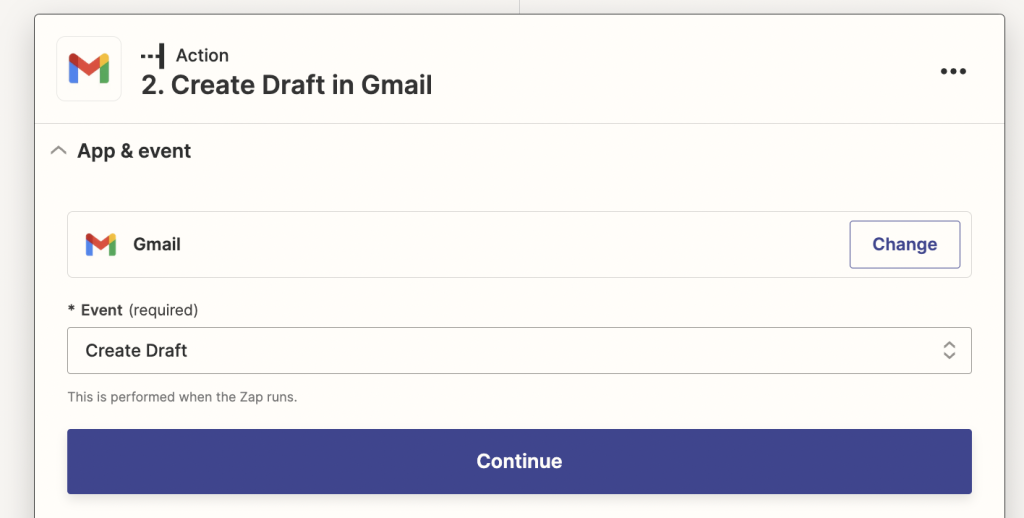
Moving on to setting up the action part – creating an email draft in Gmail. I selected Gmail as the action app and picked the action event – Create Draft – from the offered options.
After that, I added some details to the action.
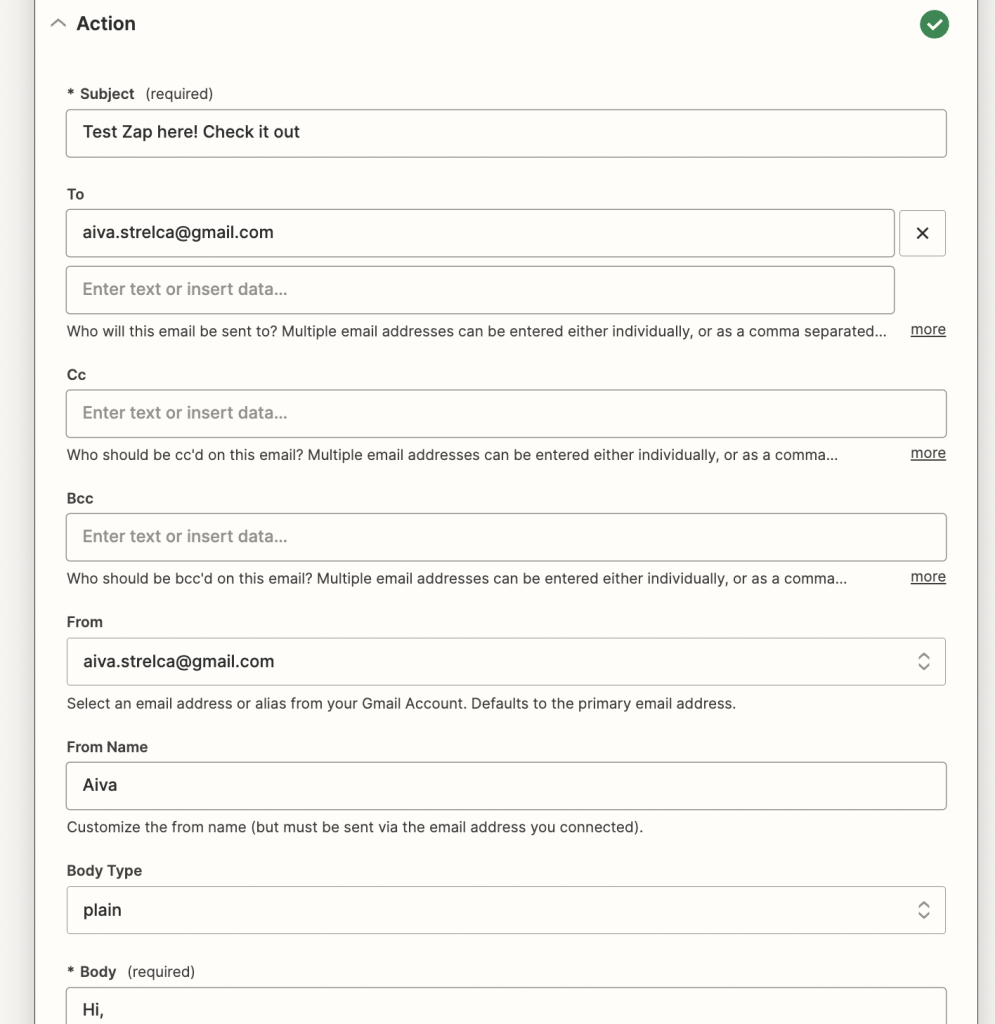
And tested the action to ensure it worked.
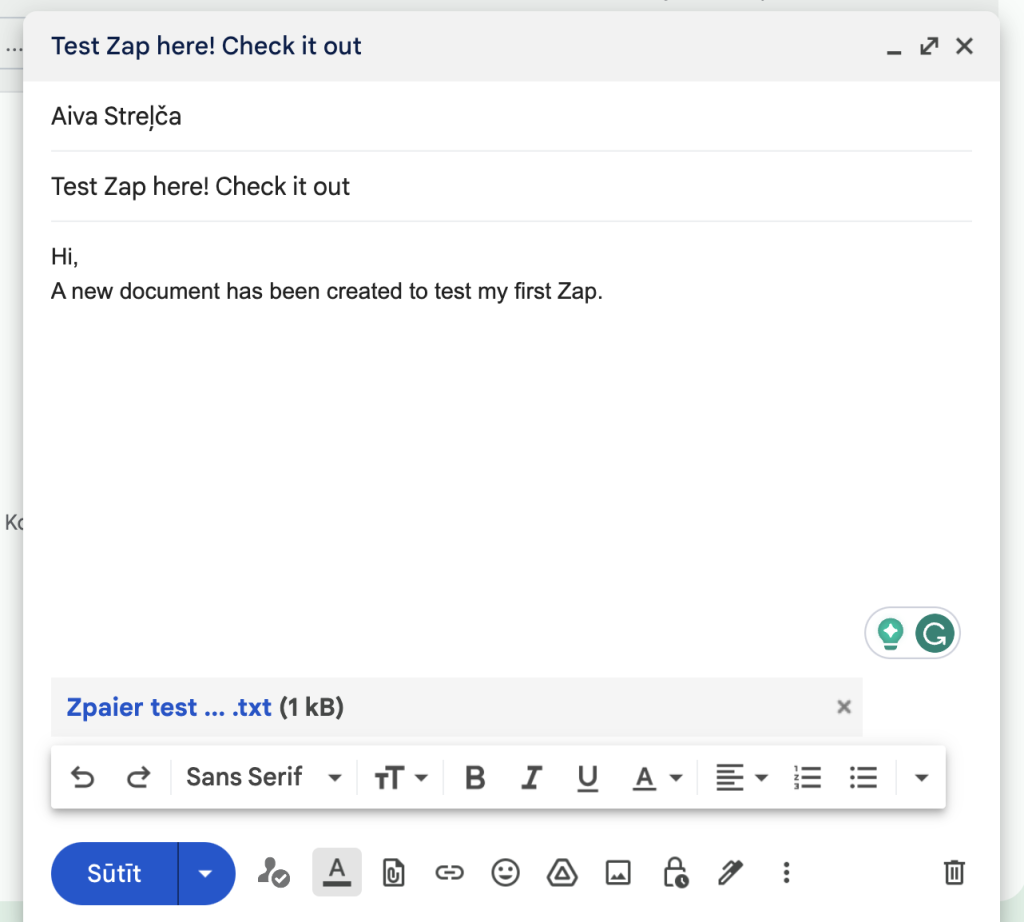
To save my Zap, I clicked the Publish button at the bottom.
! Remember to add a name to your first Zap to easily find it among the other Zaps you’ll make. It can be simply typed in on the upper left corner of the page.

Use templates for faster Zap creation
A beginner-friendly Zapier hack is using pre-built templates to create Zaps faster and with less effort. There’s no need to reinvent the wheel, and pre-built Zaps are a great way to make your life easier.
Your own recommended list of Zap templates can be found on your Dashboard. Scroll the page a bit, and you’ll see a Recommended for you section below the Recent Zaps section.
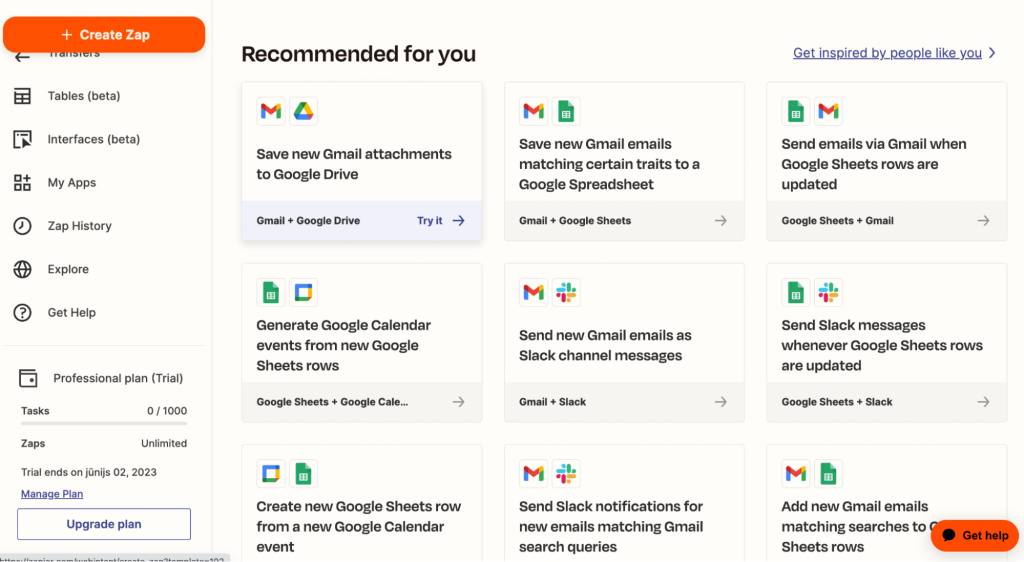
When you’ve found a template you’d like to use, click Try it. You’ll be redirected to the Zap creation page. But instead of manually setting the triggers and actions, you’ll see them already ready to use. The only thing you’ll likely need to do is sign into your third-party app accounts, so the selected Zap can work properly.
Create Zaps with the help of AI
Another way to create a new Zap is by using AI’s help. Zapier’s beta feature offers an AI-powered Zap maker. It’s located at the top of your dashboard and looks like a simple click-here-to-type box.

Its use is straightforward – you describe your automation need, and AI will suggest a trigger and a consecutive action (or several if necessary). Here’s an example:
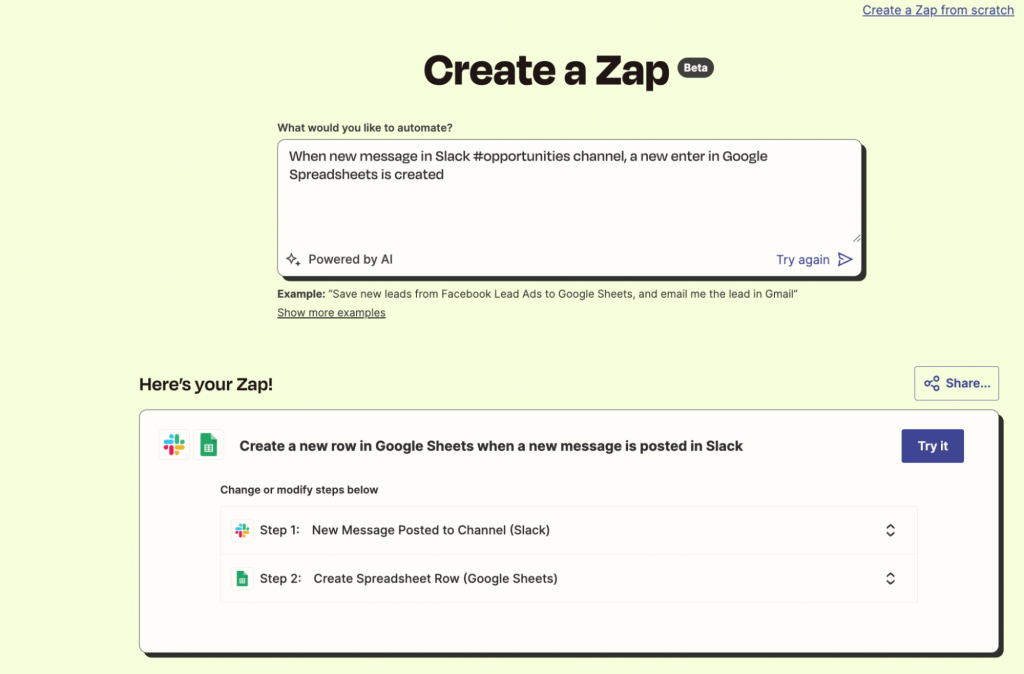
Now you can do several things:
- Click Try it to use the suggested Zap template if it fits your need
- Click on the Steps and choose another trigger or action – Zapier usually offers several
- Ask AI for help again using a different description of the workflow you’re looking to automate if the suggested Zap is offbeat
A good practice to adopt if you’re using this Zap creation method is to use simple language when describing your automation need. Plus, the feature suggests sticking to the format – “When X happens, do Y” when writing your request and adding the tools you know you’ll want to use in the description. This will help AI to offer you the best possible options.
Five commonly-used Zap types you’ll love
There, of course, are bazillion Zaps out there. However, plenty of them are shared among Zapier users as they automate standard everyday processes across companies. Thus, here are five commonly-used Zaps that may come in handy for you:
- Share your latest blog posts on social media channels: forget about manually crafting social media posts to share the latest articles from your blog on Twitter or Facebook. Use Zap templates instead – for Twitter, for Facebook.
- Collect information from online forms automatically: many companies use various online forms to gather insights and valuable data both from their customers and their team. With Zapier, you can set up a Zap that automatically sends the data from the form to your preferred information storage place, such as Google Spreadsheets, Dropbox text files, Trello, and others.
- Bringing important information to Slack automatically: Slack is used by more than 10M users around the globe. And chances are your team is among them. Zapier enables timely information sharing to Slack from selected apps or sending information from Slack channels to chosen apps.
- Add new emails to existing lists: email marketing is integral to almost any business’s marketing strategy. Zapier offers Zaps that automatically add new contacts to selected email lists.
- Send personalized thank you messages to your customers: clients love a personalized approach. While for a small business, it’s possible to send each customer a sweet thank you email, when the audience grows, it becomes impossible. Options offered by Zapier integrations go beyond a simple automated email response – set categories, customize email details, and more.
A Zapier hack to manage your tasks and to-do lists
By now, you’ve probably got the idea that Zapier’s possibilities are almost endless. Another fantastic hack on using Zapier is integrating your email with task management and to-do apps to always stay on top of your workload. Zapier enables you to set a trigger on certain types of emails – labeled, starred, containing keywords, and more – that will be converted into items on task apps of your choice.
Here’s an example of a Zap that I created to connect my Gmail inbox and my Trello profile, making sure I don’t miss client requests.
After hitting the + Create Zap button, I picked Gmail as my trigger app. Then I selected New Starred Email in Gmail option from the offered list of events/triggers and chose the Gmail account I wanted to connect this Zap to:
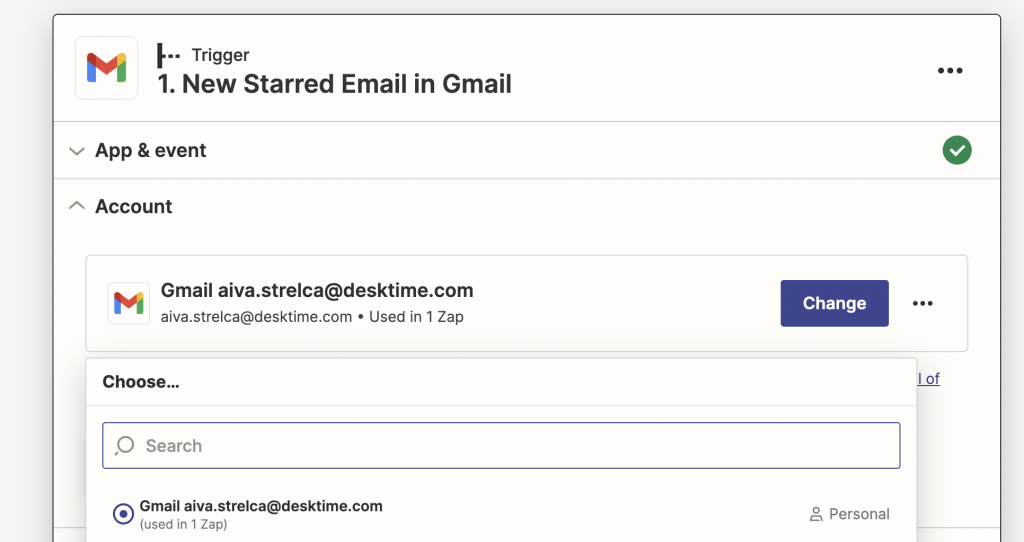
Then I tested the trigger to check if Zapier could find any starred emails from my inbox (it did).
Then I moved on to creating the action part of my new Zap. As you can see in the screenshot below, I picked Trello as the app in which the action will be performed. After connecting the Zap to my Trello account, I selected an event – Create Card in Trello:
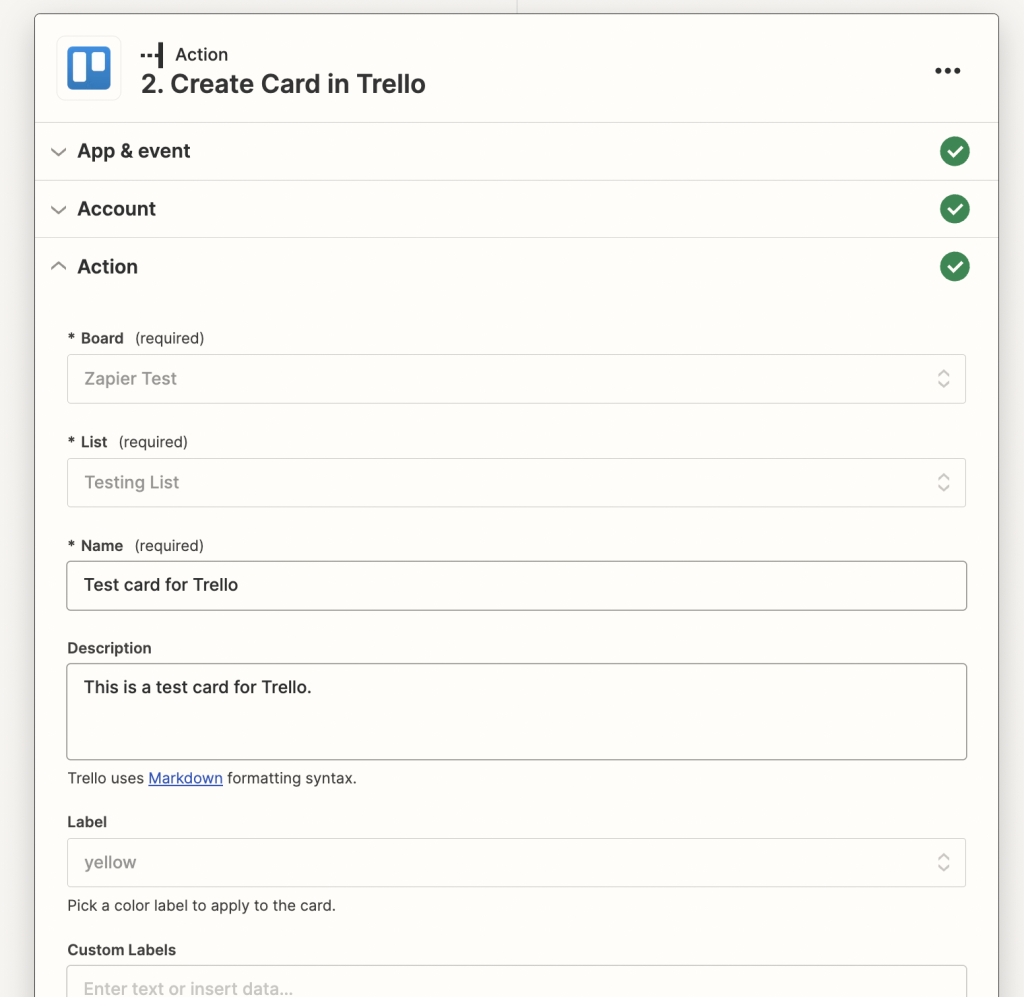
Then, I added the Trello Board I want the card to be created in and all the other required details such as the list, the name of the new card, description, label, and more.
After that, I tested the new action to see if it worked:
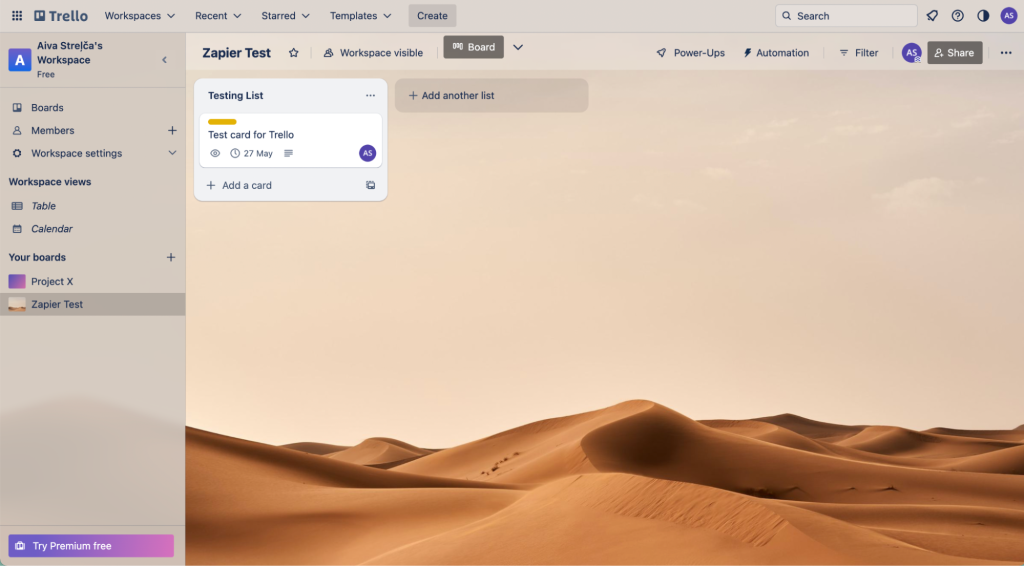
After the testing, I hit the Publish button to activate the newly created Zap. And, of course, I added a name to the Zap to find it among my other Zaps.
Bonus tip: connect Zapier with DeskTime
Last on our Zapier hacks list is integrating Zapier with DeskTime. This integration enables you to connect DeskTime to any of the 5K+ apps that integrate with Zapier.

Want to know how DeskTime works?
Become a DeskTime power-user in no time.
Connecting Zapier with DeskTime takes a few clicks:
- Open your DeskTime account. On the left side menu, find Settings, click it, then select Integrations

- Find Zapier integration among the options that appear and hit the Make a Zap button
- Now you can start creating Zaps using DeskTime and 5K+ other apps – the sky is the limit
Go on and start using the magic tool that Zapier is, and enjoy all the saved time with automated workflows!
credit: Aiva Strelca

