OneDrive Storage: tips on how to use OneDrive
If you’re not using the OneDrive cloud storage feature built into Windows 10, you’re missing out. It’s taken several years, but Microsoft has methodically developed OneDrive into a solid, reliable, tremendously useful service that gives you 5GB of cloud storage for free, with options to purchase additional space; if you have an Office 365 account, you get a terabyte of online storage with your subscription.
In this article, I explain how to use some of OneDrive’s most important features. Even if you’re an old hand with OneDrive, you might be surprised, because several of the features I describe here weren’t added until several years after the initial public release of Windows 10.
For those of us who use a PC and mobile devices every day, the advantages are profound:
- You can synchronize files between the cloud and a local folder.
- Using client software available for just about any platform, you can access files from multiple devices.
- Your backed-up files offer ransomware protection, allowing you to recover previous saved versions from the cloud.
- You can easily share files, photos, and even entire folders with friends, co-workers, and family members.
(And, if you’re philosophically opposed to cloud services, you can stop reading right here. I won’t be offended. Personally, I think the benefits are well worth it, but if you disagree, feel free to follow these instructions to disable the service and remove the icon from File Explorer.)
OneDrive or OneDrive for Business: What’s the difference?
OneDrive is a consumer service tied to a Microsoft account. It includes a free tier that offers 5 GB of file storage. You can pay to upgrade the available storage in 200 GB increments ($2 per month for 200 GB, $4 for 400, etc.), but the best deal is an Office 365 Home or Personal subscription, which includes 1000GB (1TB) of storage for up to six users. (For details, sign in to your Microsoft account and then go to OneDrive plans.)
Also: Microsoft takes aim at Google, Box, Dropbox with OneDrive switch offer
OneDrive for Business is an organizational account tied to Microsoft 365 and Office 365 Business and Enterprise plans. If you have one of these plans, you also get a terabyte of personal storage. The difference is that your personal storage is managed by your organization’s administrator, whereas OneDrive consumer accounts are under your direct control.
Both flavors of OneDrive use the same sync client. This article is primarily about the OneDrive consumer service and the OneDrive client software in Windows 10.
Several of the features I describe here require making changes in the OneDrive Settings dialog box. To get to OneDrive Settings, open File Explorer, right-click the OneDrive icon in the navigation pane, and then click Settings.
1. Set up your local sync folder.
When you first sign in to OneDrive, you get a chance to choose the folder where any files you choose to sync from the cloud will be stored. The default location is a folder called OneDrive in your user profile. That location is usually OK, but you can choose a different location; this option is most useful if you have a secondary drive (formatted using NTFS) that has more storage than your system drive.
Also: Microsoft brings ‘Known Folder Migration’ feature to OneDrive
(If you’ve already set up OneDrive and want to move your files to a new location, follow the instructions here: “Windows 10 tip: Move your synced OneDrive files to a new location.”)
Next, choose which folders you want to make available locally. Open OneDrive Settings, click the Account tab, and then click Choose Folders. Note the option at the top.
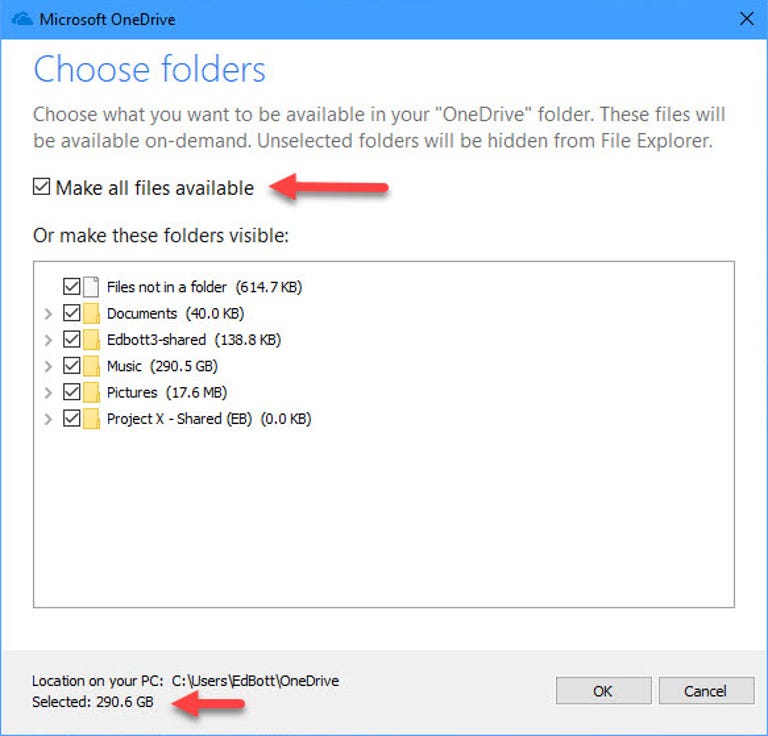
The default is Make all files available; even if you have hundreds of gigabytes of files in the cloud and limited local storage, this is still the correct option, because of a feature (introduced in Windows 10 version 1709) called Files On Demand, which I’ll get to next. (If you prefer to keep some folders offline only, without listing them in File Explorer, go through the boxes one by one.)
2. Set up Files on Demand.
Files on Demand is a signature feature of OneDrive in Windows 10. It gives you the ability to browse through your entire collection of OneDrive files using File Explorer even if those files are not synced to your PC. (Dropbox has a similar feature, called Smart Sync, but it’s only available on paid plans.)
Also: What’s the best cloud storage for you?
If you open a file, OneDrive downloads it immediately (that’s the “on demand” part); you can also mark files to be available even if you’re not connected to the internet. To use this feature, right-click any file or folder and then click Always keep on this device. A solid green icon in the Status column shows which files are available offline.
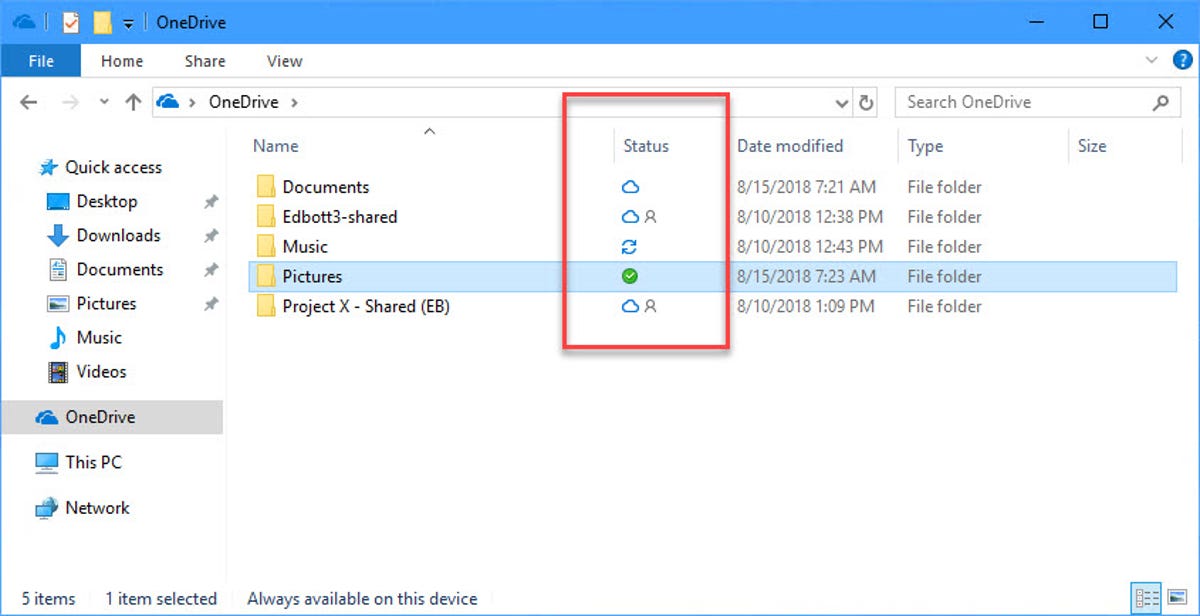
If you no longer need to keep those offline copies, right-click the file or folder and then click Free up space to remove the local copies. (They remain available in the cloud and on demand.)
3. Sync your Desktop, Pictures, and/or Documents folders.
This feature appeared for the first time in 2018 with little fanfare and is tremendously useful. You have the option to redirect any or all of three system folders that are part of your user profile to the cloud instead. The effect is the same as if you had changed the default location of the Desktop, Documents, or Pictures folder to a folder with matching names in your OneDrive folder, giving you a continually updated backup of all your personal files.
Also: Microsoft SharePoint tip: Clean up OneDrive syncing
To make this change, open OneDrive Settings, click the Backup tab, click Manage Backup, and choose the option you prefer for each of the three folders.
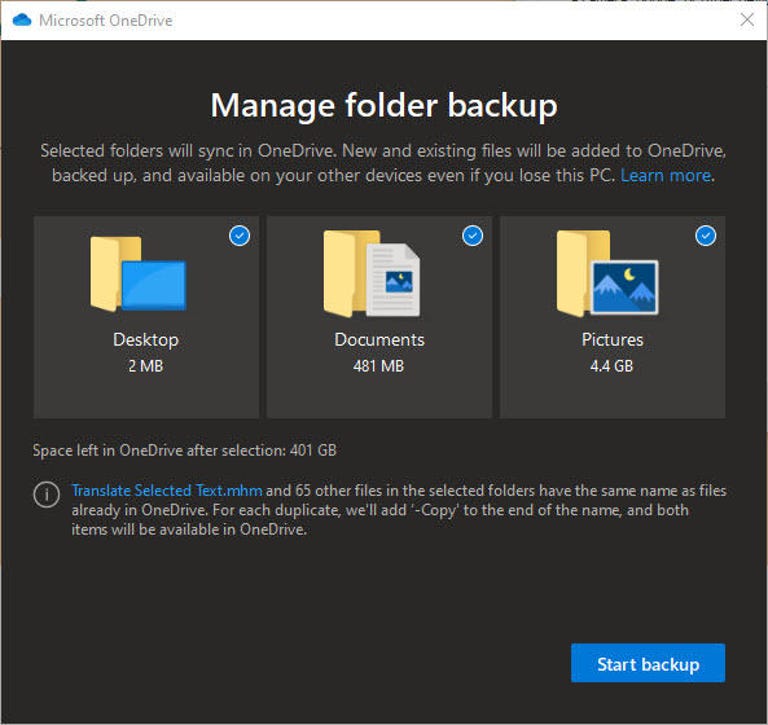
After you make the change, OneDrive moves files from the respective folder in your local profile to the matching folder in OneDrive and merges any existing files from the cloud-based folder. Any changes you make to the files in the OneDrive folder on any device will be synced to all your devices.
4. Share a file with a quick link.
If you have a file stored in OneDrive and you want to share it with someone else, there’s a super-fast way to accomplish that task. Right-click the file in File Explorer and then click Share a OneDrive link. OneDrive generates a short link and copies it to the Clipboard, ready for you to paste it into an email message or a chat window.
Also: Microsoft trumps Google, Dropbox in business cloud storage wars TechRepublic
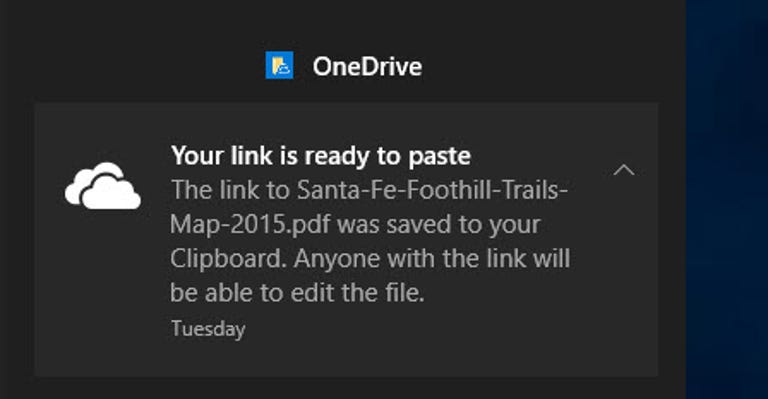
Anyone who has that link can open and edit the file, so use this option only when you’re sending a file to a trusted friend or colleague.
5. Share a file with extra security.
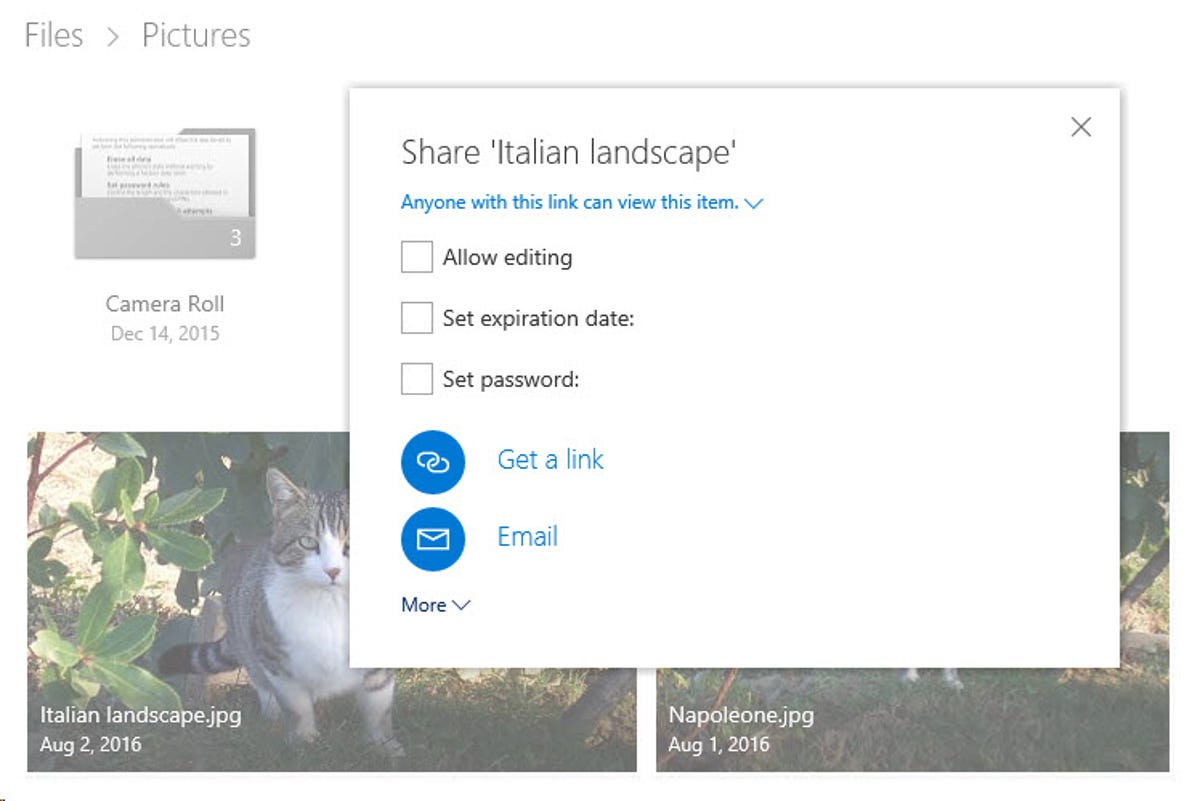
Quick links are convenient, but you might want a little more control when sharing a file or folder from OneDrive. For example, you might not want the recipient to be able to edit the file, or you might want the link to expire so it can’t be reused if someone stumbles across it in an old email. Or perhaps you want to protect the shared link with a password (which you should share with the recipient separately from the link itself, of course).
Also: Save space with OneDrive’s new feature
You can do any or all of those things by right-clicking a file or folder in File Explorer and then choosing More OneDrive sharing options. That opens OneDrive in your web browser with the Share dialog box open for the object you selected, as shown here.
windows 10
6. Create a shared folder for your family or teammates.
One of the easiest ways to use OneDrive for file sharing is to set up a dedicated folder that you and other people can use to share files. This option works great with for sharing with friends or family members your family, with a small office, with a project team.
In OneDrive, create the folder you want to use for sharing. Give it a name that will make its purpose immediately obvious even if someone else sees it in their OneDrive: For example, you might call it 2019 Budget – Shared Files. Sync that folder to the cloud and send a shared link to that folder with the other person (or persons) you want to share it with. (Make sure you allow editing.)
Your friends or co-workers receive a link that takes them to OneDrive on the web, where they can click Add to my OneDrive.
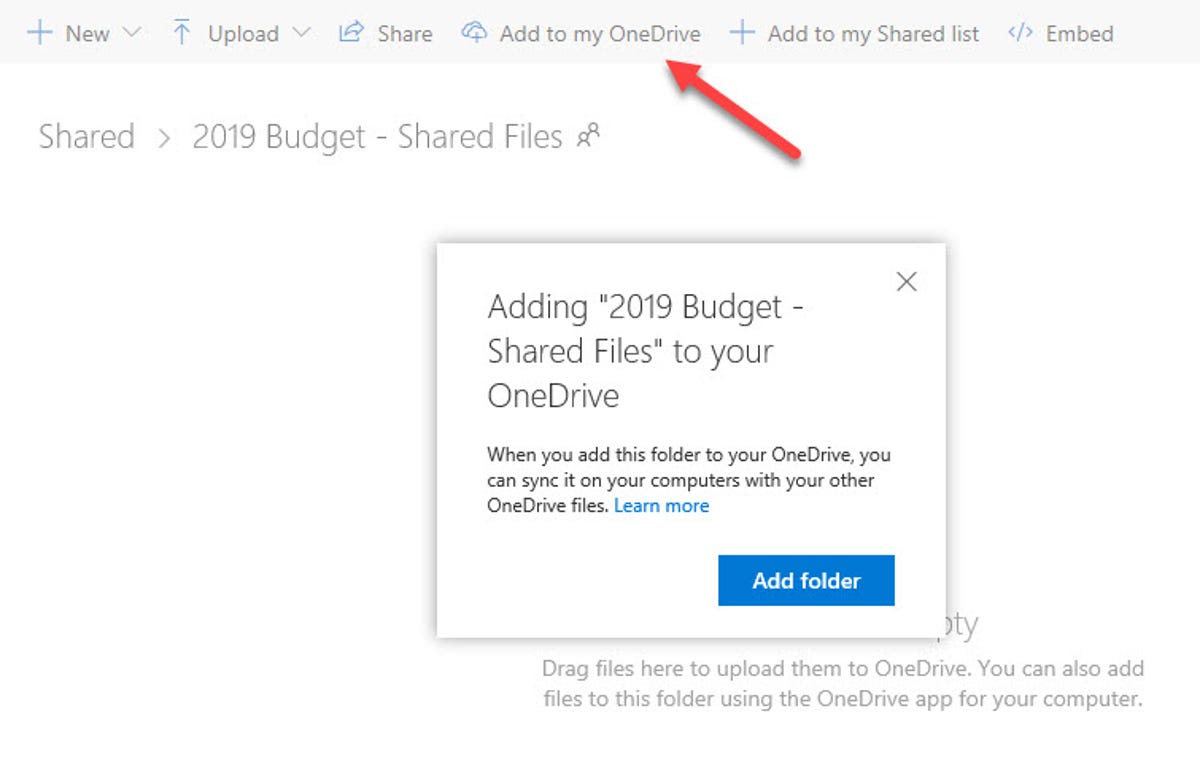
That adds the shared folder to their OneDrive. It shows up in File Explorer automatically, and any files either of you add, edit, or delete are automatically synced to everyone else in the group.
That’s just a sampling of things you can do with OneDrive. If you’ve got favorite tips or tricks, feel free to share them in the comments section, or click my by-line and send me a note.
Credit: www.zdnet.com

