How to Setup Zoho CRM in Easy Steps
Effective customer relationship management is crucial for success in today’s business environment. Zoho CRM offers powerful tools to streamline sales, enhance marketing efforts, and improve customer service interactions. This guide provides essential steps to create and manage your Zoho CRM account, from initial setup to customization, integration with other tools, and ongoing management. By following these steps, you can optimize your CRM system to drive business growth and foster stronger customer relationships effectively.
About Zoho CRM
Zoho CRM is a cloud-based customer relationship management platform designed to help businesses of all sizes manage their marketing, sales, customer support, and inventory management in a single platform.
There are many features of Zoho CRM but a few are given below:-
- Lead Management
- Pipeline management
- Sales Workflow Automation like follow-ups, reminder
- Quote
- Analytics and Reporting
- Third-Party Integration
How to Set up Zoho CRM
Creating a Zoho CRM Account
Step 1) Signup for Zoho CRM
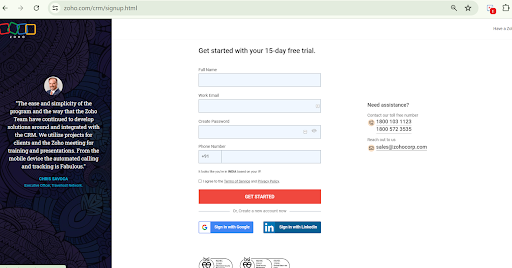
Step 2) Account Creation
You will be prompted to create a Zoho account if you don’t already have one. Fill in the required details such as email address, password, and organization name. After setting up your account, you can access the account’s information on the record’s details page. This page provides a comprehensive overview of the account’s contents, including potentials and contacts associated with the account, activities, notes, events, emails, and more, all in one place.
Step 3) Access your Zoho Account
- Once registered you have to log in to your Zoho account using your credentials, you will be directed to your CRM dashboard.
- You can locate anything within this popular CRM software on the search option.
- Click ‘+’ which gives shortcuts to lead, contact account, deal, campaign, call, task and meeting in the Zoho CRM
- In the right shortcuts, you’ll find the calendar and profile (this is the area to include or modify details about your profile).
- On the right, you’ll find Zoho applications connected to sales & marketing, finance, emails & collaboration, and additional tools integrated with Zoho CRM.
- Now navigate Zoho CRM features
Step 4) Manage Leads
In the top-left corner, you’ll see ‘Leads’. Click on it. This is where you can make and keep track of your leads. You can either import leads (which is pretty easy) or make a new one.
Select a ‘Create a Lead’ option and incorporate details such as the lead owner’s name, first name, position, contact phone number, mobile number, source of the lead, industry, and other pertinent information. Ensure to save the data in the top-right corner of the screen.
You have successfully generated a lead within the Zoho CRM system.
When necessary, you can edit this information at any time. Feel free to add notes (such as follow-up reminders), attachments, open activities (including tasks, meetings, and calls), closed activities, emails, invited meetings, campaigns, and social information.
On the right you find options:
- Send an email
- Convert this lead into a customer (by clicking it, you can also create a new deal for this client)
- Edit information about this lead
On the right side of the three dots, you can:
- Clone the lead (with minor changes made at your end)
- Delete the lead
- Print a preview and other options
Step 5) Add Contacts
- Navigate to the menu, and select ‘Contacts’.
- Now, you have two choices: to either import existing contacts or create new ones.
- Similar to creating a lead, you can create a contact within Zoho CRM.
- Keep account information (Accounts > Select account > Details tab) updated with relevant data such as contacts, interactions, and notes.
Step 6) Lead Conversion
- To convert leads click on the ‘Leads’ section of the homepage and choose the lead you wish to convert.
- In the Lead Conversion Page, choose the appropriate account/contact option.
- Check the “Select New Deal for this Account/Contact” box if you’re looking to set up a deal for turning leads into customers.
- Enter all the required information for the deal section and click the button to convert the deal.
Step 7) Manage your Deals
- In the ‘Deals’ section, you can monitor and control your sales pipeline.
- Click ‘Create a Deal’ and incorporate the information like the deal Owner, Deal name, Account Name, Amount, and Lead Source.
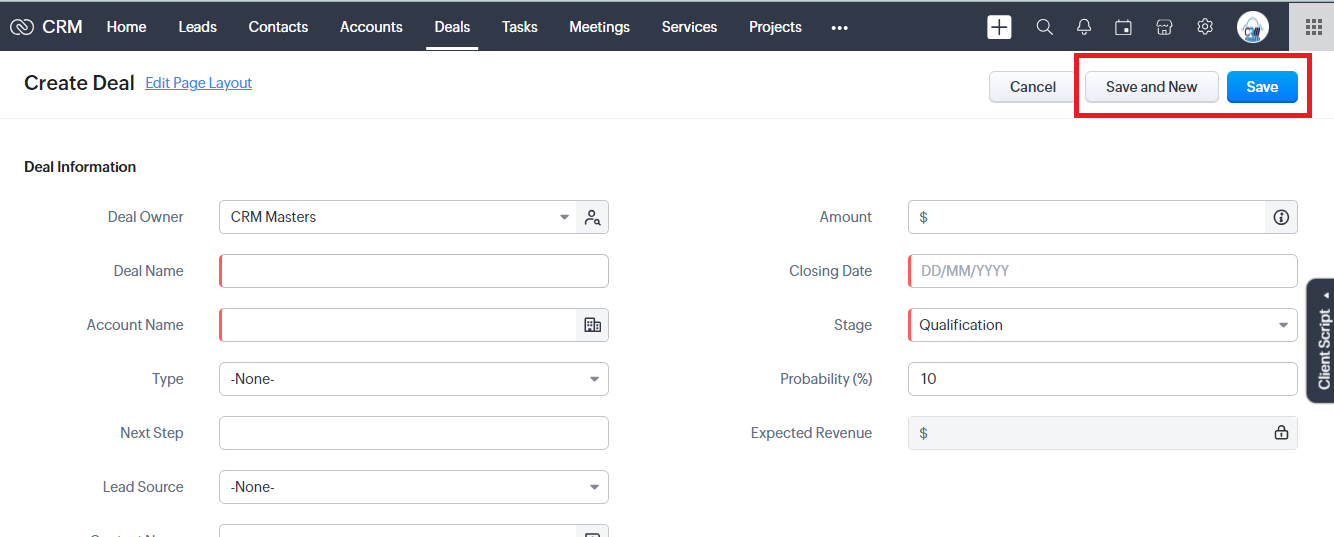
- Click ‘Save’. Now, you can edit each stage of the sales pipeline for this deal.
Step 8) Track Your Activities
- Go to the ‘Activities’ on the menu bar.
- There are three options to track your customer interactions Schedule a Call, create a meeting, create a task, and Integrate telephony.
Step 9) Dashboard and Reports for Track Activities
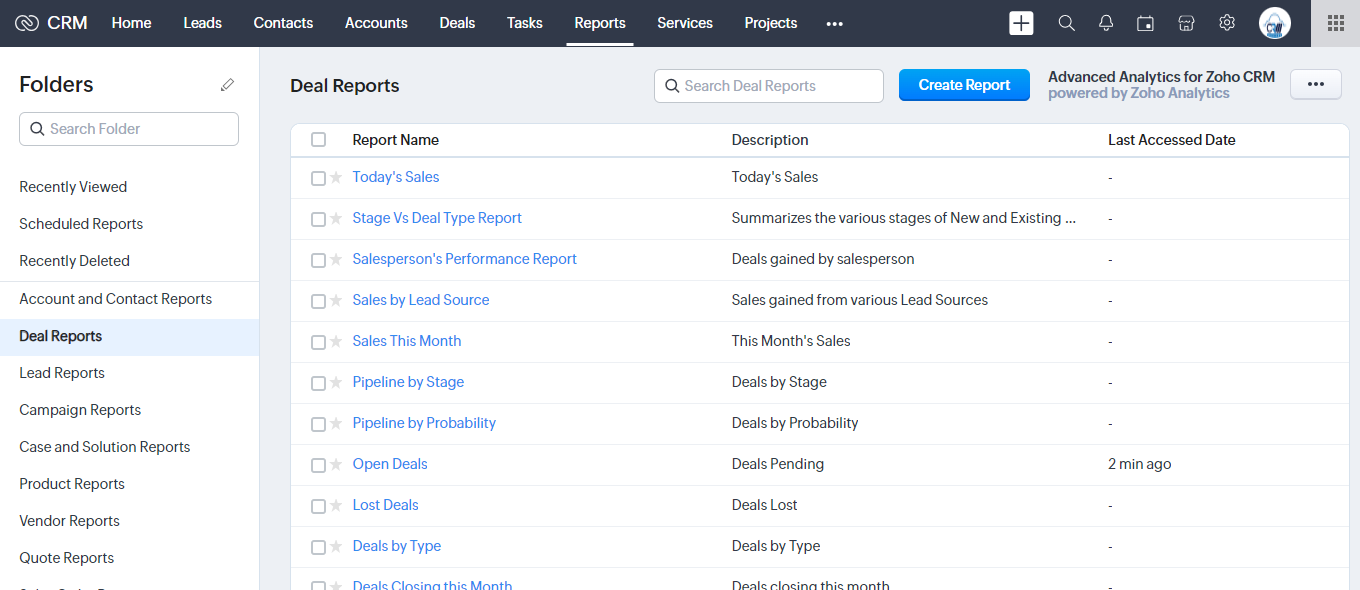
- In the Reports section, you have the option to create custom reports of your deal module or lead module like campaign reports, vendor reports, product reports, etc.
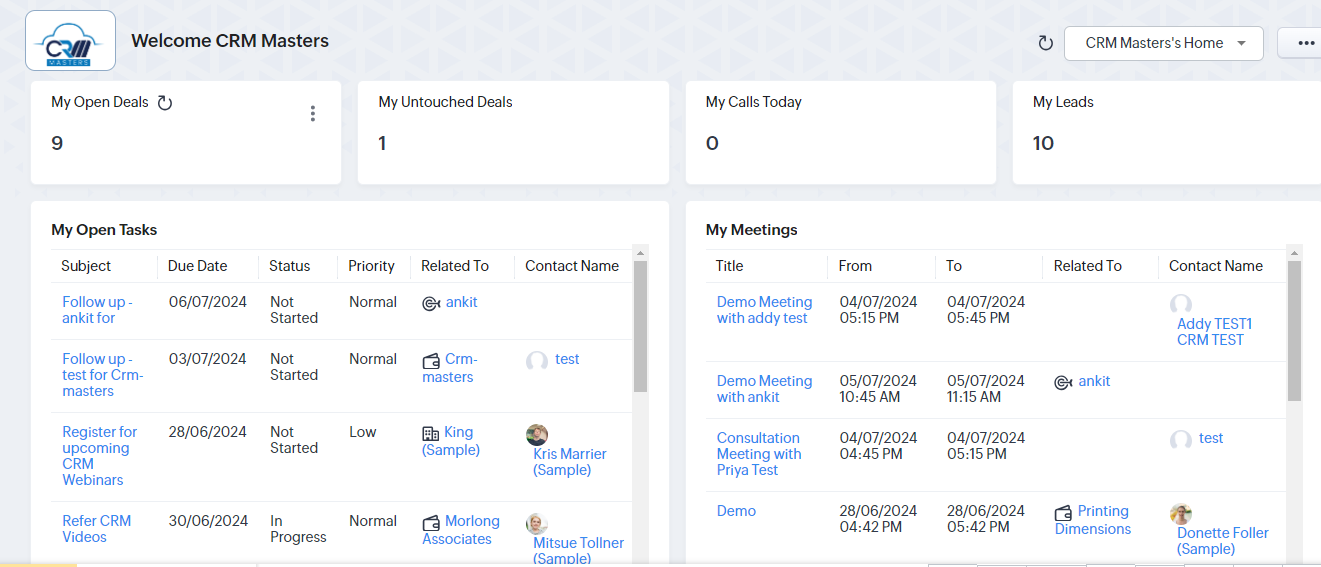
- The dashboard feature allows you and your senior management to monitor the usage metrics of every function. It also enables you to see the total count of function calls, Open Deals, Untouched Deals, and Lead functions that were run within the specified time frame.
Step 10) Record Filter
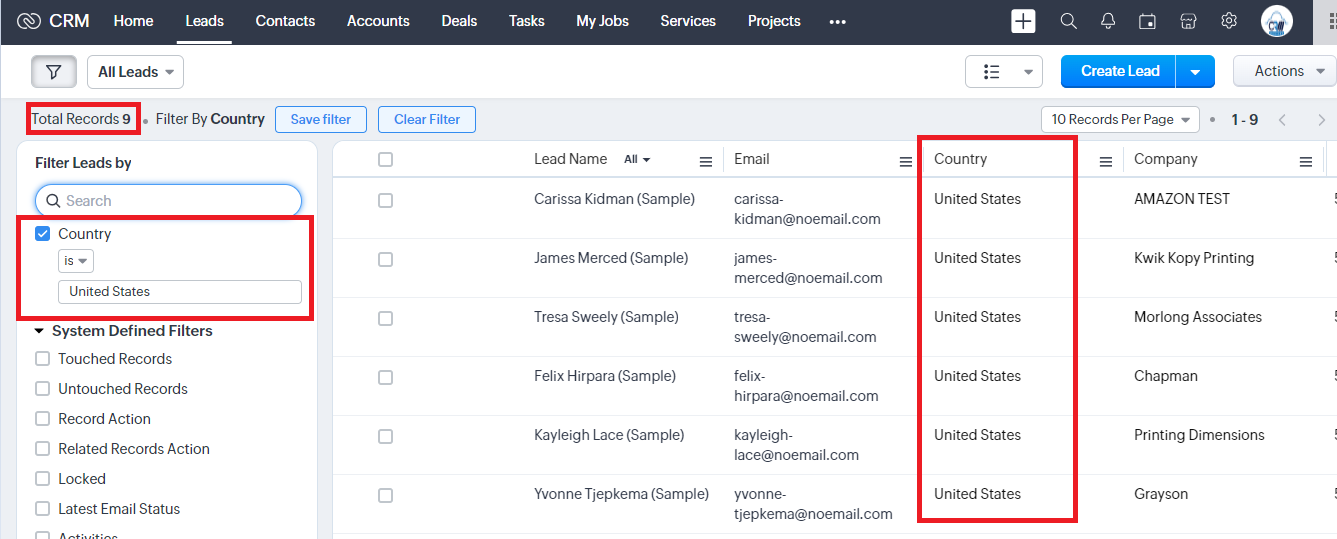
If you want to add a record on particular criteria like country United States then all the records associated with the country United States are shown in your Zoho CRM.
Conclusion
Achieving your business goals becomes effortless when equipped with the right tools. Setting up Zoho CRM into your business drives sales, and enhances customer satisfaction. From signing up and customizing to connecting with other tools, automating tasks, and using the dashboard for insights, each step helps you work smarter and faster with Zoho.
Hire the Zoho Implementation Partner
CRM Master’s Infotech is a trusted Zoho CRM consultant with a team of experienced developers who make sure your Zoho CRM setup goes smoothly and fits what your business needs.
credit: CRM-Masters

